
DIY chest lining using Wilful Ink wallpaper
- rcbattlestore
- May 22, 2020
- 6 min read

The amazingly talented Emma from Wilful Ink and a fellow Macabre Market girl asked if I could have a play around with some of her wallpaper and of course I was more than happy to oblige!
I got a roll of the beautiful Goliath beetle paper, which is a rich deep purple ground with silver beetle print with delicate dot work, and although I am not looking to revamp any of my walls anytime soon that doesn’t mean that wallpaper can’t be used for other decretive purposes!
I thought I would take the opportunity to show you how I transformed the chest from a simple pine, to a delightful statement pieces (that is almost to good to be storing bedding in.)
Now when I first started working on the chest I wasn’t intending to document the process, so I don’t have any photos of the chest before I started working on it but it was a simple plain pine chest with a clear vanish, this had stat in my boyfriends child hood bedroom, (so it also bore some scaring and staining from pens and markers along with many a tea ring.)
First up its important to remove the previous layers of varnish, you can do this wither with a wood stripper if you have lots of layers, but we went straight in with a rotary sander and also rubbed the chest down with turpentine to bring out the vanish from the wood, and to help prevent the sand paper from clogging.
Once the wood was stripped back, this is when you would fill in any nocks and dents with wood filler (if you have any, to smooth out the surface and have it looking good as new, we missed this step out as we was on lockdown and didn’t have any wood filler to hand)
With the wood prepped it is time to prime… or it wood be if I had a primer to hand, instead I went straight in with a watered down grey paint (its actually one of the greys I used on the ombre wall)
Next up, waxing. This stage is really important to help seal in the paint, and to avoid oily finger print staining, we used Rust-Oleum colourless wood wax, which helps to seal in the paint and leaves a soft sheen on the furniture. That’s it the outside is done.... but of course it’s the inside that makes this chest so special!


Lining the Chest
Now the fun part, lining the chest!! Well nearly there is still quite a bit of prep work yet.
You can use this technique to line anything from draws, to trays or anything you want.


First up measure, I highly recommend going down the measure twice cut once motto, it will really help you speed things up and get faster results with less waist. I also recommend drawing up an annotated map with the pieces you will need with the dimensions needed; it makes everything super clear when everything is written out…. at this stage I also unscrewed the lid so the hinges and screws can be cleaned up and it will also make lining a lot easer.
Next up is making templates. I highly recommend this as it gives you an extra assurance that your measurements are not only accurate, but it will also help you see any problems that might come up from sides that are not quite straight or if edges aren’t square. I used craft paper for my templates, but newspaper would work too.

I marked up the size of each side of the chest and cut out slightly larger, allowing me to fold the sheet to size and checking on against the chest. That way if the templates came up small I could unfold the paper to the correct size.
If you have any screws or hinges like it did marking the positions on the templates will make everything a lot simpler when it comes to screwing everything back together.
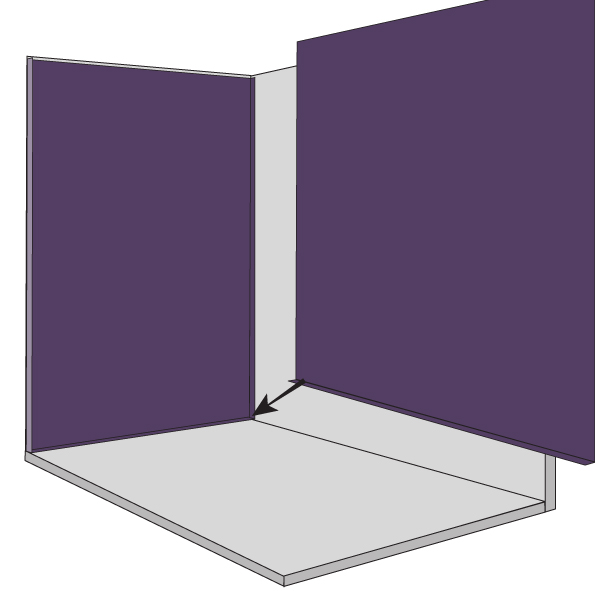
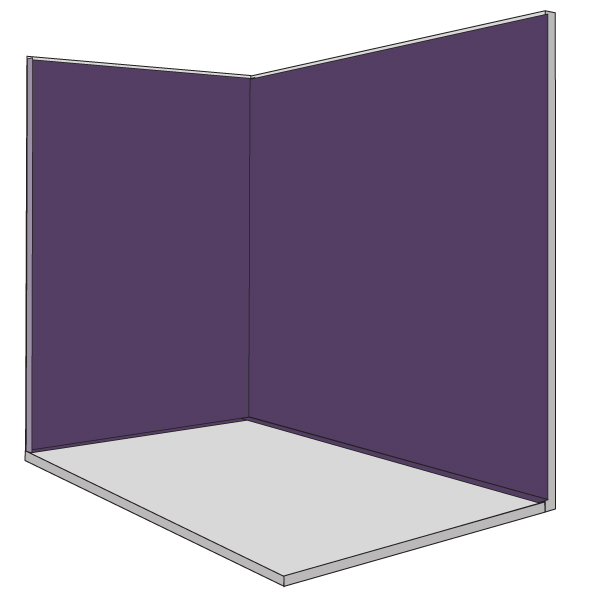
In order to make sure that everything went together nicely and that there wouldn’t be any nasty gaps of wood showing through in the corners I decided to make the panels overlap, to do this I made the length of the side pieces 1cm longer so it could fold down onto the base, and made the side ends 1cm wider on either side so they could fold onto the longer lengths. I have included some diagrams bellow showing how the bottom edges and sides fold in.


Once you have all your dimensions and know that everything will fit it's time to cut out in the actual wallpaper!!
A couple of tips for cutting in actual paper:
1. Make sure you have your length and widths clearly labelled so you know which is which…. I thought I had
done this clearly but when cutting out the ends I ended up getting these confused and cutting them out the wrong way round. Remember measure twice; check twice so you only need to cut once!
2. Annotate the back of the paper: mark the top and bottom, sides, if you will be matching in the middle note this too… this will make everything so much easer when it comes to sticking the paper to the chest.
3. Pattern matching…if the chest was much wider than the widths of the paper on all sides other than the two ends, although I wasn’t to fussed about the pattern following though from side to side, I wanted to make sure that the pattern matched along each individual side of the chest. You want to keep in mind the pattern repeat when cutting out.
4. If you are going to overlap any of the pieces, mark the fold lines on the back of the paper, and loosely fold along this line. (You don’t want a crisp fold, just a folded guide to use when sticking to the chest)
Once all the pieces are cut labelled and checked it's time to actually start gluing!

For this I used good old Mod Podge, which is a great all round glue and sealant, they have lots of different types of glues and sealants depending on the desired finish, I opted for the Matte Waterbase Sealer/glue And Finish.
Working one side at a time, I applied a good dollop of glue to the chest, spreading out evenly with a brush, it is really important that the glue is applied evenly to make sure that the paper adheres with out are bubbles when it dries.
I then carefully laid the first sheet of paper over the glue, pressing into the corners and pressing everything flat with an old store loyalty card, pushing out any are bubbles. (Don’t worry if the glue spills out or goes over the paper, just smooth it out and it will dry clear.)
Where you have sheets over lapping, like where I have folded the corners over onto the adjacent sides, you will need to do the under layers first (i.e. the two ends) and wait for it to completely dry before working on the next side.
Work sides that have multiple widths of paper next to each other together, working one piece then the next, lining up the print and smoothing out all air bubbles.
Once the paper has been applied to everything and it is fully dry, it is then time to seal everything! This helps to make sure that everything is all stuck down in all the edges, and helps to protect the project from every day use.
Simply brush more of the Mod Podge over the paper, really make sure to work it into all of the corners and seams of the paper I added extra along the top edges of the chest as this will be a week point to where the paper could peel off from. Smooth out the glue, and don’t worry about the white cast, it will dry down clear!!

Now all that’s left is to reassemble everything!!
Note: we did polish the hinges, and clean up the screws, to help give the metal work some of its shine back. Using a handy little rotary tall we picked up from the middle aisle in Lidl.

Remember the templates we made back at the beginning, with the screw hold positions on? Place these back over the corresponding lid and sides, once you are sure that everything is lined up nicely (and you definitely have the right template for the right side the right way up… it’s a whole lot of rectangles so best to be safe than sorry) take one of the screws and carefully poke/ press it over the mark into the wallpaper bellow.


What I found is that some the screw went into some of the screw holes really easily, where as some of them took a bit more wiggling or force where the markings may have been slightly out, or there may have been more glue behind the hole. Once all the screw holes are pierced through, simply screw the hinges back into place.


Comments